- Home
- Screenshots
- Download
- License
- Documentation (2.2.0.final)
- History
- Get Involved
- Foundation
Reverse Dependency Explorer
Introduction
When working with multiple projects in a workspace that represent the whole or part of a larger application, you may want to simultaneously change the revisions of dependencies in several Ivy files to a single new revision all at the same time (notwithstanding the eviction mechanism inherent to Apache Ivy).At other times it is instructive just to see what dependencies are being utilized by projects in the workspace by revision without having to dig into each project and look at each individual module descriptor.
The Reverse Dependency Explorer turns the dependency tree upside-down, exploring the workspace by organization, module, and revision and providing a mechanism to synchronize revisions across projects/classpath containers.
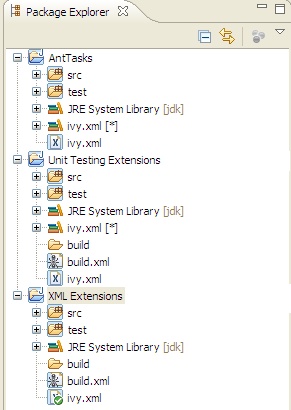
Consider the following workspace, with three projects, all of which have an ivy.xml file at their project root. Each of these Ivy files has an associated IvyDE managed classpath container.

Right clicking on any (or all) of the projects and selecting Ivy > Reverse Dependency Explorer opens the view. The explorer displays a tree structure with an item for each organization/module pair. The third column lists all of the revisions of this pair for the selected projects. Expanding a tree item, you can see the module revision that a given Ivy classpath container depends on (if at all). Note that the view only shows direct dependencies and no transitive dependencies.

Organization/module pairs that have conflicting revisions are highlighted in red (junit in the above example). Note that in the above example, though the revisions do not match, these two revision attributes may actually resolve to the same artifact, depending on what is available in the repository. The view does not attempt to perform a resolve and match the resolved artifacts. It simply compares the text of the attributes.
Synchronizing revisions
To synchronize revisions, click in the column and row of the item you want to change and type in the new revision. The item should be highlighted green to indicate that it is tagged for synchronization. Click the synchronize button as shown to save your changes.
Printer Friendly

